
Building a Profile Registration Screen in Vibecoding Lesson 31
What You'll Learn in This Lesson
So far, we've implemented all these features:
Sign-up
Login
Logout
Email verification
Password reset
Now users can use the service, but they don't have any information to display to other users yet. In this lesson, we'll create a profile registration screen.
We'll implement these elements together:
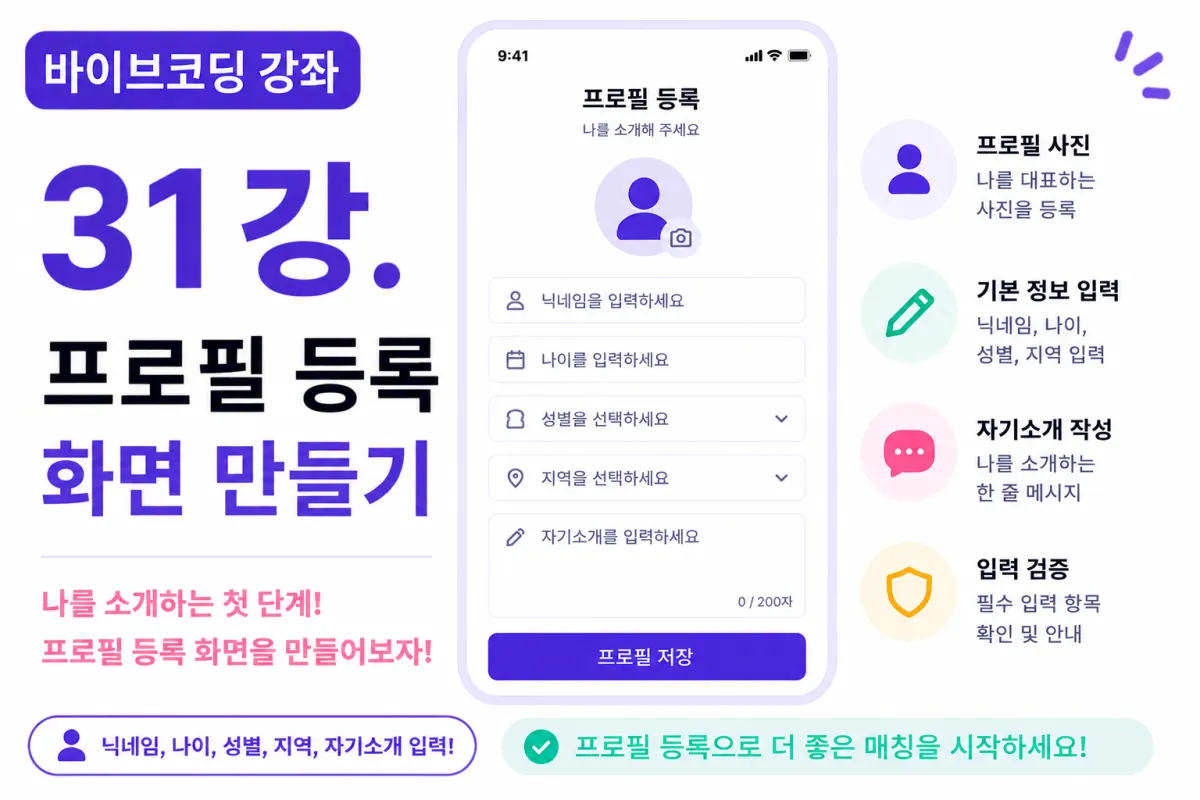
Profile registration UI
Input field configuration
Mobile screen design
Using common components
Creating the screen with Cursor AI
This lesson will complete only the UI (screen), and actual saving functionality will be implemented in the next lesson.
Why Is a Profile Important?
In dating apps, the profile is the most important feature.
Users decide whether they're interested in someone based on their profile.
If a profile is empty, the matching probability can drop significantly.
A well-designed profile screen enhances the overall completeness of the service.
What Information to Collect?
In this project, we'll collect these details:
Profile photo
Nickname
Age
Gender
Location
About me
We'll start with core information, and additional fields like interests will be added in later lessons.
Profile Registration Flow
After completing sign-up,
users will automatically be directed to the profile registration screen upon first login.
We'll configure it so users can only access the home screen after completing their profile.
Requesting Help from Cursor AI
First, we request from Cursor AI:
Using Next.js and Tailwind CSS, create a mobile-first profile registration screen. Include fields for profile photo, nickname, age, gender, location, and about me.
The AI generates the basic screen.
Profile Photo Section
At the top of the screen,
a circular profile image will be displayed.
If no photo is uploaded, a default image will show instead.
Photo upload functionality will be implemented in the next lesson.
This time, we're just setting up the space for it.
Nickname Input
The nickname is the name displayed to other users.
It's common practice to use a nickname instead of an email address.
We'll set the placeholder as:
Nickname
as the input prompt.
Age Input
Age will be entered as a numeric field.
In actual services, users often enter their birthdate to calculate age automatically.
For this project, we'll simply collect the user's age directly.
Gender Selection
Gender can be selected using a dropdown or radio buttons.
We'll initially offer two options:
Male
Female
We can expand this later based on service policies.
Location Input
For location, a dropdown box is better than text input.
We'll provide options like:
Seoul
Busan
Daejeon
Incheon
Daegu
We'll keep it simple for this project.
About Me Input
The 'About me' section will use a textarea field.
To help users avoid writing too much,
we'll display the current character count and maximum limit:
0 / 200 characters
This helps guide user input.
Save Button
After completing all inputs,
users click the 'Save Profile' button.
This lesson will implement it to verify input values only.
Actual saving functionality will be covered in the next lesson.
Input Validation
Before saving,
we'll check these items:
Nickname entered
Age entered
About me length
If any fields are missing, error messages will be displayed.
Tailwind CSS Styling
This project will use these design principles:
Rounded cards
Wide input fields
Sufficient padding
Larger save button
The design ensures mobile-friendly input experience.
Using Common Components
We'll reuse the Input component created in the sign-up screen.
Buttons will use our common Button component.
This keeps the entire project's design consistent.
Editing with Cursor AI
If you're not satisfied with the generated screen,
you can request changes like:
Make the 'About me' input larger.
Fix the save button at the bottom of the screen.
Increase padding for easier mobile input.
The AI will adjust the screen according to your requests.
Handling Users Without Profiles
If a user hasn't completed their profile,
they shouldn't be allowed to access the home screen.
We'll keep showing the registration screen until they complete it.
This ensures all users start with basic information when using the service.
Testing
Now let's run and test the screen:
Input fields display correctly
Button functionality
Mobile view
Tablet view
If everything displays properly, it's a success.
GitHub Commit
After completing the profile registration screen,
ask Cursor AI to:
Create a commit message for this feature implementation.
This is good practice for managing your project by features.
Next Lesson Preview
In the next lesson, we'll implement profile photo upload functionality.
We'll use Supabase Storage to upload images and display them as user profile pictures in a practical demonstration.
Conclusion
In this lesson, we've created the profile registration screen.
We completed input fields for nickname, age, gender, location, and 'about me,' establishing the foundation for users to enter their information.
In the next lesson, we'll add photo upload functionality to create a more complete profile system.
FAQ
Why is the profile important for dating apps?
In dating apps, users decide whether to interact based on profiles. An empty profile significantly reduces matching chances.
What information does this tutorial collect for profiles?
This lesson collects: profile photo (to be added later), nickname, age, gender, location, and 'about me' text.
Korean Source
This article is an English localization of a Korean-language report from BlogScore. Original: [바이브코딩 강좌] 31강. 프로필 등록 화면 만들기