
Designing Your Project Folder Structure in Next.js: A Practical Guide
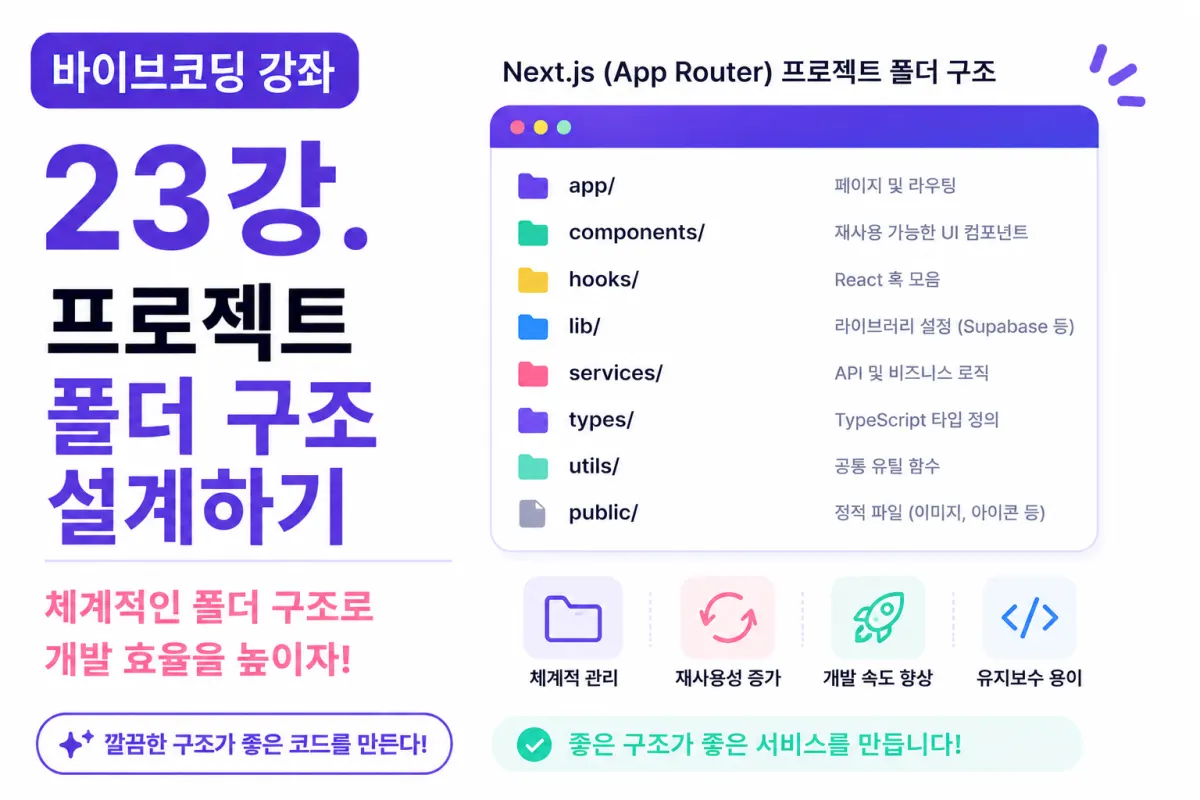
What You'll Learn in This Lesson
In the previous lesson, we set up a UI development environment using Tailwind CSS.
Now that your screen setup is ready,
there's one essential task you must complete before writing code:
designing your project folder structure.
A well-planned folder structure from the start makes it easier to manage as your project grows,
and helps AI tools better understand your project.
In this lesson, we'll cover:
Designing a folder structure
Separating folders by role
Managing components
Handling shared code
Improving the structure with Cursor AI
Let's get started.
Why Is Folder Structure Important?
At first, you might only have a few files.
But as your project grows,
you'll end up with dozens or even hundreds of files.
If you don't organize them into folders,
finding the right file can take significant time.
A good folder structure is the foundation of good development habits.
App Router Default Structure
In Next.js App Router, the default structure looks like this:
app/
public/
package.json
However, for a real service,
this basic setup isn't enough.
You'll need to add feature-specific folders to organize your project effectively.
The Folder Structure We'll Use
For this project, we'll use the following structure:
app/
components/
hooks/
lib/
services/
types/
utils/
public/
Each folder serves a different purpose.
The 'app' Folder
This is where you manage pages.
For example:
app/

login/

page.tsx
creates a /login page.
All screens—sign-up, profile, chat—are managed in the app folder.
The 'components' Folder
This stores reusable UI components.
Examples include:
Button
Input
Card
Header
Footer
Once created, these components can be reused across multiple screens.
The 'hooks' Folder
This is for managing React Hooks.
For example:
useAuth()

useUser()

useChat()
Separating hooks by functionality makes your code cleaner.
The 'lib' Folder
This stores external library configurations.
For example, Supabase connection code would be managed here:
lib/
supabase.ts
This folder becomes increasingly important as your project grows.
The 'services' Folder
This manages actual business logic.
For example, features like sign-up,
login,
profile saving,
and chat are separated into service units.
API calls should also be handled here.
The 'utils' Folder
This stores common functions used across the project.
Examples include:
Date conversion
String processing
Email validation
Using this folder reduces duplicate code significantly.
The 'types' Folder
This manages TypeScript types.
For example:
User

Profile

Message
Storing interfaces here allows consistent type usage across the project.
Do We Need an 'assets' Folder?
In this project,
most images will be stored in the
public/
folder.
User-uploaded images will use Supabase Storage.
Therefore, we won't create a separate assets folder.
Requesting Structure Design from Cursor AI
Now, ask Cursor AI to suggest a structure:
Next.js App Router project.

Recommend an appropriate folder structure for a dating app.
The AI will propose a structure based on your project's scale.
You can remove unnecessary folders
and add needed ones as required.
Separating Folders by Functionality
It's even better to divide components into functionality-based folders.
For example:
components/

auth/

chat/

profile/

custom/
This makes management much easier.
Common Components
Components used across all screens go into the common folder.
Examples include:
Button
Input
Modal
Loading
Avatar
This increases reusability significantly.
Distinguishing Between Pages and Components
A common mistake among beginners is writing all code in page.tsx files.
In real development,
pages should only handle assembling screens,
while actual UI components are separated into components.
This makes maintenance much easier.
The Benefits Grow as Your Project Scales
At first, organizing folders might seem tedious.
But as your project grows,
you'll realize how important a clear structure is.
AI tools also generate more accurate code when the folder structure is well-defined.
Refactoring with AI
As you develop your project,
you may need to improve your folder structure.
For example, asking:
Analyze and improve the current project structure.
will prompt Cursor AI
to suggest a better organization.
Development Principles for the Future
For this project, we'll follow these principles:
Keep pages simple
Make components reusable
Move functions to utils
Manage APIs in services
Handle types in types
Following these principles alone will significantly improve your project quality.
Time to Start Building Screens
Your project structure is now complete.
From here on,
you'll build actual screens one by one.
Sign-up,
Login,
Profile,
Messaging,
Chat—
All features will be developed within this structure.
Next Lesson Preview
In the next lesson, we'll create a common layout (Layout).
We'll implement headers, bottom menus, and common screen structures first,
to lay the groundwork for faster page development later.
Closing Thoughts
A great project starts not just with good code but with a solid structure.
In this lesson, we designed the folder structure for our dating app project,
clearly defining each folder's role.
Your project foundation is now complete.
In the next lesson, we'll build common layouts to begin actual screen development.
FAQ
Why is folder structure important in Next.js?
A well-designed folder structure makes it easier to manage files as your project grows and helps AI tools better understand your codebase.
What's the benefit of using a 'components' folder?
It stores reusable UI components like Buttons, Inputs, and Cards, which can be used across multiple screens without duplication.
Korean Source
This article is an English localization of a Korean-language report from BlogScore. Original: [바이브코딩 강좌] 23강. 프로젝트 폴더 구조 설계하기