
Building a Profile Detail Screen for Dating Apps in Next.js
What You'll Learn in This Lesson
In the previous lesson, we implemented profile editing functionality.
Now users can freely manage their own profiles.
However, in dating apps, viewing other users' profiles is even more important.
In this lesson, we'll implement the Profile Detail Screen.
We'll cover these topics together:
Fetching user information
Profile card UI design
Displaying interests
Showing bio text
Like button implementation
Chat button placement
By the end of this lesson, you'll have a profile screen similar to real dating apps.
What is a Profile Detail Screen?
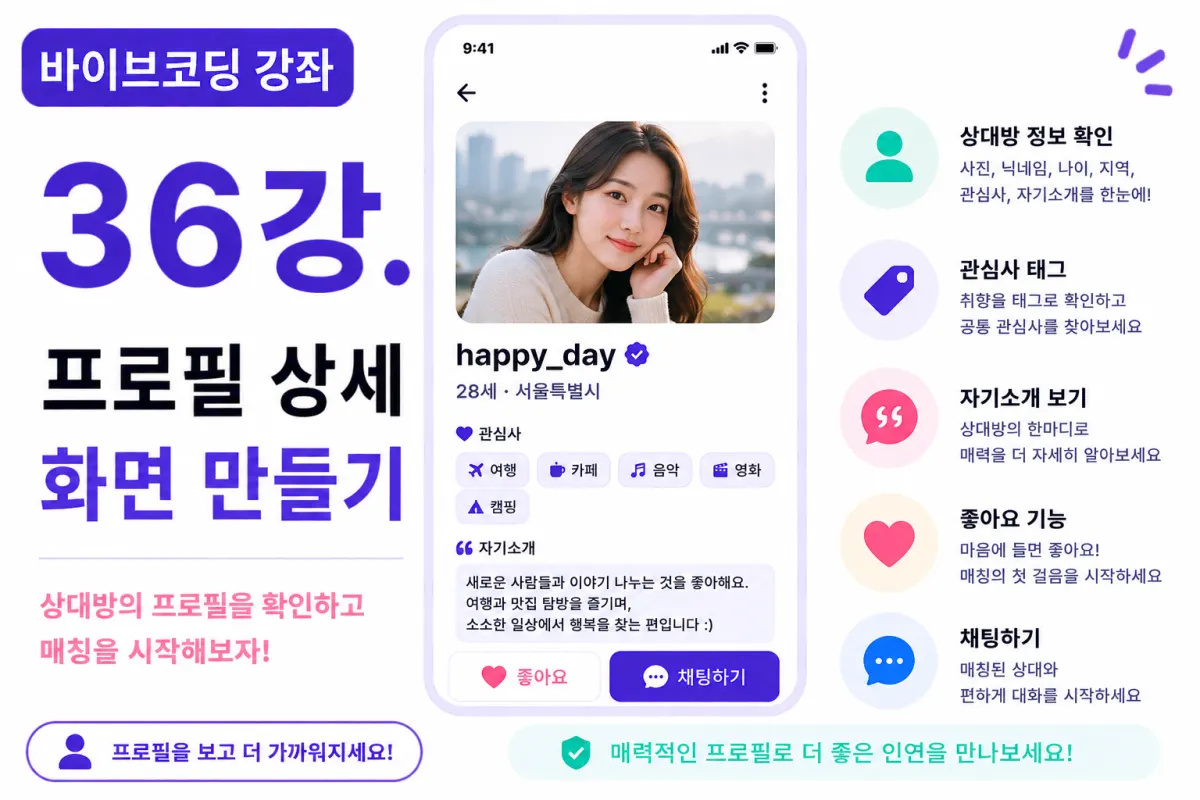
A profile detail screen displays information about other users.
For example, you can see:
Profile photos
Nicknames
Ages
Locations
Interests
Bios
This is the most important screen for making matching decisions.
Screen Layout
In this project, we'll structure the screen in this order:
Profile photo
Nickname
Age and location
Interest tags
Bio text
Like button
Chat button
This sequence allows users to naturally browse information.
Requesting Help from Cursor AI
First, we'll ask Cursor AI with this request:
Build a dating app's profile detail screen using Next.js and Tailwind CSS.
Include photo, interests, bio,
like button, and chat button.
The AI generates a mobile-friendly profile detail screen.
Fetching User Information
When the profile screen opens,
we'll query the Supabase Database for the selected user's information.
We'll fetch these items:
Profile photo
Nickname
Age
Location
Bio text
Interests
After fetching, the information automatically displays on screen.
Displaying Profile Photos
Profile photos will be prominently displayed at the top of the screen.
If no photo is available,
a default image will appear instead.
Since photos make the biggest first impression, they should be shown in a sufficiently large size.
Nickname and Basic Information
Beneath the photo,
we'll display the nickname prominently.
Below that,
28 · Seoul
We'll show age and location together like this.
This one-line format improves readability.
Displaying Interest Tags
User-selected interests will appear as tags.
For example:
🎵 Music

☕ Cafe

🏕 Camping

🎬 Movies
This format helps quickly understand user preferences.
Displaying Bio Text
The bio will appear in card format.
We'll apply appropriate line spacing and margins for easy reading.
If the text is too long,
a 'Read More' feature could be added (though we'll display everything fully in this project).
Like Button
This is the most important button on the profile screen.
If users like someone, they can tap the like button.
In this lesson, we're implementing just the UI,
with actual liking functionality to come in a later section.
Chat Button
If the user is already matched,
the chat button will also appear.
We haven't implemented chat functionality yet,
but we'll prepare the button placement now.
In the next section, we'll connect the actual function.
Image Loading Handling
While loading profile photos,
a placeholder image will display instead.
Once images load completely,
they'll smoothly replace the placeholders.
These small details improve user experience.
Handling Missing Profile Data
If a profile can't be found,
we'll display this message:
No profile information found.
Well-designed error screens are also important for user experience.
Improving Design with Cursor AI
After completing the functionality,
we'll ask Cursor AI:
Improve the profile detail screen to make it more polished.
The AI will help refine:
Card design
Spacing
Button placement
Checking Responsiveness
We'll test the profile screen on both mobile and tablets.
We'll check if images are cropping,
buttons are too small,
or text is overflowing.
We'll use Tailwind's responsive classes effectively.
Testing
We'll verify these items:
Profile photo display
Nickname visibility
Bio text output
Interest tags display
Like button appearance
Chat button presence
If all functions work properly,
the profile detail screen is complete.
GitHub Commit
Once functionality is complete,
we'll ask Cursor AI:
Create a commit message for implementing the profile detail screen.
Consistent commits are crucial for project management.
Profile System Complete
With this lesson completed,
the entire profile system will be finished.
Now users can:
Register their information, and
view other users' profiles.
The next step is implementing the matching system based on this information.
Next Lesson Preview
Starting from the next lesson,
We'll implement the matching system:
Load user lists, display them in card format,
and gradually add like and dislike functionality.
This is where the real dating app features begin.
Conclusion
In this lesson, we built a profile detail screen.
We fetched user information from Supabase Database,
displayed photos, interests, and bios in an attractive card format,
and placed like and chat buttons appropriately.
Starting next lesson, we'll implement the matching system to complete the core features of a dating app.
FAQ
What is the purpose of a profile detail screen in dating apps?
The profile detail screen displays essential user information like photos, age, location, interests, and bio to help users decide whether to match with someone.
How does the app handle missing profile images?
If no profile photo is available, a default placeholder image will display until the actual photo loads.
Korean Source
This article is an English localization of a Korean-language report from BlogScore. Original: [바이브코딩 강좌] 36강. 프로필 상세 화면 만들기